
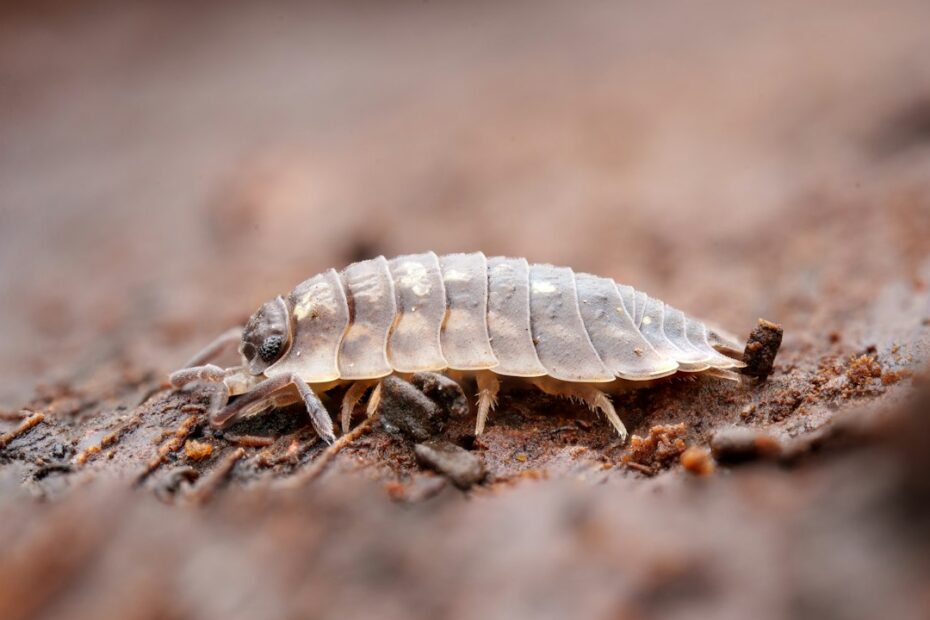
If you look closely at an isopod colony, you may occasionally see an animal whose front and rear halves seem to differ in color or texture. It can look alarming if you have not seen it before. In many familiar terrestrial isopods, though, that uneven appearance can be part of a normal molt.
Unlike the single-piece shed many people picture, land isopods usually replace the rear part of the exoskeleton first and the front part afterward. The animal is between those two stages for a short time. A newly exposed cuticle is soft and flexible; as it hardens, its appearance changes. That can make a molting animal look temporarily two-toned.
The color difference is a clue, not a diagnosis. Lighting, substrate, species, and the individual animal can all affect how obvious it looks. One unusual-looking animal by itself does not tell you that the colony has a calcium problem or that the animal is sick.
The molt happens in two stages
In the biphasic molt documented for terrestrial isopods, the posterior half sheds first; the anterior half follows later. A study examining Armadillidium vulgare and another land isopod describes the two halves as typically separated by about one to two days. Research on Porcellio scaber also follows the species through this two-part molt cycle.
This sequence has biological value. It lets the animal keep part of its existing cuticle while the other half is being replaced, and it limits how much newly exposed surface is vulnerable at once. During the interval, the new cuticle is still soft. Studies also show that terrestrial isopods move and reuse calcium during the molt cycle; that biology is one reason to leave the animal and its shed material undisturbed.
The exact timing and visible appearance can vary. Think of the one-to-two-day interval as a result reported for studied species and conditions, not a timer for every individual or every species.
What should you do when you see one?
Usually, the best response is to leave the animal alone and keep the habitat stable.
- Do not pick the isopod up to inspect the boundary between the two halves.
- Keep its normal cover and moisture gradient in place. Damp substrate should not mean a waterlogged enclosure.
- Leave shed cuticle in the enclosure. Isopods may consume it, and it is part of the normal habitat material.
- Avoid making a sudden calcium or feeding change based only on one two-toned animal. For the broader evidence on calcium, see Do Isopods Need Calcium?
If you see repeated deaths, visible injuries, or a persistent change across many animals, inspect the whole enclosure and its conditions rather than treating color alone as a diagnosis. The first-colony setup and arrival checklist covers the basic habitat checks.
A simple classroom observation
Molting is also a useful reminder that a colony contains animals at different stages, even when the class is studying one behavior or habitat question. Students can record what they see without handling or marking individual isopods:
- Choose one observation time each day and keep the viewing conditions similar.
- Count animals whose front and rear halves appear different, along with the total number visible.
- Record the date, species if known, and whether the animal was under cover or exposed.
- Keep the substrate, light, and shelter conditions steady; do not pull apart the habitat to search for hidden animals.
- Repeat across several days and, if possible, across more than one independent container.
The result is a record of visible molt-like appearances, not a measurement of total colony growth or a controlled test of what caused molting. Many isopods will be hidden, and an observer cannot reliably assign every pale or dark patch to a molt stage from color alone. For planning the number of animals and stations, use the classroom pill-bug count guide.
The practical takeaway
When one half of an isopod looks different, a normal two-stage molt is one reasonable explanation. Give the animal cover, keep its usual conditions steady, and observe rather than handle it. If you are preparing a colony for a home or classroom, start with the setup and arrival checklist and browse the current Armadillidium vulgare listing; the listing shows the specific pack size and current ordering options.
Sources
- Nako, J.-D., Lee, N. S., and Wright, J. C. (2018). Water vapor absorption allows for volume expansion during molting in Armadillidium vulgare and Porcellio dilatatus. ZooKeys, 801, 459–479.
- Ziegler, A. et al. (2016). Mineral in skeletal elements of the terrestrial crustacean Porcellio scaber: distribution and changes during the moult cycle.
- Rieger, G. and Salvenmoser, W. (2008). Ultrastructural changes of the anterior and posterior sternal integument of Porcellio scaber during the moult cycle.
Have you noticed a two-toned isopod or watched a molt in your colony? Tell us what you observed in the comments, including whether the animal completed the molt and anything that may help other keepers.